- Next.js 環境構築 👈ココ
- PrismaとPostgreSQLの設定
- NextAuth ログイン機能の実装
- NextAuth ログイン制御の実施・機能拡張
- Tiptapでマークダウンエディタ作成
- 日記の登録
- 画像のアップロード MinIOの設定
概要
まずはじめにNext.js 14のプロジェクトを作成します。
パッケージ管理はpnpmを使ってますがnpm、bunなどお好みのものを使ってください。
App Routerを使っていますが 14の新機能 は使ってません。
参考:pnpmのメリット

参考:bun

Next.jsプロジェクトを作成する
手順には記載しませんが、エディタはVSCodeを使ってます。
$ pnpx create-next-app@latest対話形式でプロジェクトを作成します。
Would you like to use src/ directory?ソース管理でsrc配下を使うか直下にappを配置するかが決まります。noをする場合は後続の作成ファイルのディレクトリ構成に注意してください(src配下にまとめているケースが多いように思います)。Would you like to customize the default import aliasこの時点では意図が分かってなくてNoにしましたが、 これもYes推奨です。 コンポーネント間のimport時に@/を用いて root からのパスで指定できます(手で書き直してました)
✔ What is your project named? … tiptap-diary
✔ Would you like to use TypeScript? … Yes
✔ Would you like to use ESLint? … Yes
✔ Would you like to use Tailwind CSS? … Yes
✔ Would you like to use `src/` directory? … Yes
✔ Would you like to use App Router? (recommended) … Yes
✔ Would you like to customize the default import alias (@/*)? … No
起動を確認しておきます。
$ pnpm dev

▲ Next.js 14.0.4
   - Local:        http://localhost:3000
デフォルトの表示
プロジェクトの初期化
Next.jsプロジェクトから不要な設定を削除し、デザインを整えます。
デザインが苦手すぎるのでいい感じのテンプレート探して加工して使います。
今回は Preline にあるレイアウトをベースにしました。
cssの初期化
不要な記載を削除します。
@tailwind base;
@tailwind components;
@tailwind utilities;
layout.tsxの初期化
日記らしく手書きっぽさを出したいのでフォントはキウイ丸を採用しました(ここはお好みで)。
import type { Metadata } from "next";
import { Kiwi_Maru } from "next/font/google";

import "./globals.css";

const kiwi = Kiwi_Maru({ subsets: ["latin"], weight: "400" });

export const metadata: Metadata = {
  title: "Tiptapダイアリー",
  description: "日記アプリケーションサンプル",
};

export default function RootLayout({
  children,
}: {
  children: React.ReactNode;
}) {
  return (
    <html lang="ja">
      <body className={kiwi.className}>{children}</body>
    </html>
  );
}
page.tsxの初期化
export default function Home() {
  return <div>Home</div>;
}
この時点でこんな表示
Prelineのインストール
Next.jsへの適用方法を参考に実施します。
参考: https://preline.co/docs/frameworks-nextjs.html
PrelineはTailwindで作られたコンポーネントライブラリで、汎用的に使えるものが揃っています。
以下公式の手順に従って実施します。
$ pnpm add preline

dependencies:
+ preline 2.0.3
prelineをtailwindのコンフィグに組み込みます。
※後述のshadcn/uiでinit処理を実行すると、ここで設定した内容が上書き更新されてしまいます(残す方法が現状分からず)。Prelineが急に動かなくなった場合はconfigを参照し、設定が消えていないかを確認してください。
import type { Config } from "tailwindcss";

const config: Config = {
  content: [
    "./src/pages/**/*.{js,ts,jsx,tsx,mdx}",
    "./src/components/**/*.{js,ts,jsx,tsx,mdx}",
    "./src/app/**/*.{js,ts,jsx,tsx,mdx}",
    "./node_modules/preline/preline.js",
  ],
  theme: {
    extend: {
      backgroundImage: {
        "gradient-radial": "radial-gradient(var(--tw-gradient-stops))",
        "gradient-conic":
          "conic-gradient(from 180deg at 50% 50%, var(--tw-gradient-stops))",
      },
    },
  },
  plugins: [require("preline/plugin")],
};
export default config;
Prelineのローダー作成
手順を参考にpreline-script.tsx を作成します。
"use client";

import { usePathname } from "next/navigation";
import { useEffect } from "react";

import { IStaticMethods } from "preline/preline";
declare global {
  interface Window {
    HSStaticMethods: IStaticMethods;
  }
}

export default function PrelineScript() {
  const path = usePathname();

  useEffect(() => {
    import("preline/preline");
  }, []);

  useEffect(() => {
    setTimeout(() => {
      window.HSStaticMethods.autoInit();
    }, 100);
  }, [path]);

  return null;
}
Prelineのローダーを組み込む
手順を参考にルートに組み込みます。
import PrelineScript from "@/components/preline-script";
import type { Metadata } from "next";
import { Kiwi_Maru } from "next/font/google";

import "./globals.css";

const kiwi = Kiwi_Maru({ subsets: ["latin"], weight: "400" });

export const metadata: Metadata = {
  title: "Tiptapダイアリー",
  description: "日記アプリケーションサンプル",
};

export default function RootLayout({
  children,
}: {
  children: React.ReactNode;
}) {
  return (
    <html lang="ja">
      <body className={kiwi.className}>
        {children}
        <PrelineScript />
      </body>
    </html>
  );
}
Headerの作成
ヘッダを作成していきます。
利用するのはダッシュボード画面なので、 (dashboard) に分類して配置していきます。
Lucide のインストール
アイコンは Lucide を利用するので、ここで追加しておきます
$ pnpm add lucide-react

dependencies:
+ lucide-react 0.307.0
Headerファイル作成
Prelineの下記テンプレートを参考として作成します。
参考: https://preline.co/examples/navigations-navbars.html#base-header
ドロップダウンメニューのトグルからは「日記の作成」「日記一覧」をドロップダウンから選択できる形に整えておきます。svgはLucideに置き換えてます。
import { ChevronDown } from "lucide-react";
import Link from "next/link";

async function Header() {
  return (
    <header className="z-50 flex w-full flex-wrap border-b border-gray-200 bg-white py-3 text-sm sm:flex-nowrap sm:justify-start sm:py-0 dark:border-gray-700 dark:bg-gray-800">
      <nav
        className="relative mx-auto w-full max-w-7xl px-4 sm:flex sm:items-center sm:justify-between sm:px-6 lg:px-8"
        aria-label="Global"
      >
        <div className="flex items-center justify-between">
          <Link
            className="flex-none text-xl font-semibold dark:text-white"
            href="/"
            aria-label="Brand"
          >
            <div>
              <span className="text-red-600 dark:text-red-500">日誌</span>
              のアプリ
            </div>
          </Link>
          <div className="sm:hidden">
            <button
              type="button"
              className="hs-collapse-toggle flex h-9 w-9 items-center justify-center rounded-lg border border-gray-200 text-sm font-semibold text-gray-800 hover:bg-gray-100 disabled:pointer-events-none disabled:opacity-50 dark:border-gray-700 dark:text-white dark:hover:bg-gray-700 dark:focus:outline-none dark:focus:ring-1 dark:focus:ring-gray-600"
              data-hs-collapse="#navbar-collapse-with-animation"
              aria-controls="navbar-collapse-with-animation"
              aria-label="Toggle navigation"
            >
              <svg
                className="hs-collapse-open:hidden h-4 w-4"
                width="16"
                height="16"
                fill="currentColor"
                viewBox="0 0 16 16"
              >
                <path
                  fillRule="evenodd"
                  d="M2.5 12a.5.5 0 0 1 .5-.5h10a.5.5 0 0 1 0 1H3a.5.5 0 0 1-.5-.5zm0-4a.5.5 0 0 1 .5-.5h10a.5.5 0 0 1 0 1H3a.5.5 0 0 1-.5-.5zm0-4a.5.5 0 0 1 .5-.5h10a.5.5 0 0 1 0 1H3a.5.5 0 0 1-.5-.5z"
                />
              </svg>
              <svg
                className="hs-collapse-open:block hidden h-4 w-4 flex-shrink-0"
                width="16"
                height="16"
                fill="currentColor"
                viewBox="0 0 16 16"
              >
                <path d="M4.646 4.646a.5.5 0 0 1 .708 0L8 7.293l2.646-2.647a.5.5 0 0 1 .708.708L8.707 8l2.647 2.646a.5.5 0 0 1-.708.708L8 8.707l-2.646 2.647a.5.5 0 0 1-.708-.708L7.293 8 4.646 5.354a.5.5 0 0 1 0-.708z" />
              </svg>
            </button>
          </div>
        </div>
        <div
          id="navbar-collapse-with-animation"
          className="hs-collapse hidden grow basis-full overflow-hidden transition-all duration-300 sm:block"
        >
          <div className="mt-5 flex flex-col gap-x-0 gap-y-4 sm:mt-0 sm:flex-row sm:items-center sm:justify-end sm:gap-x-7 sm:gap-y-2 sm:ps-7">
            {/**sm:[--trigger:hover] */}
            <div className="hs-dropdown [--adaptive:none] [--strategy:static] sm:py-4 sm:[--strategy:fixed]">
              <button
                type="button"
                className="flex w-full items-center font-medium text-gray-500 hover:text-gray-400 dark:text-gray-400 dark:hover:text-gray-500 "
              >
                <span className="text-red-600 dark:text-red-500">日記</span>
                のページ
                <ChevronDown className="h-4 w-4" />
              </button>

              <div className="hs-dropdown-menu hs-dropdown-open:opacity-100 top-full z-10 hidden rounded-lg bg-white p-2 opacity-0 transition-[opacity,margin] before:absolute before:-top-5 before:start-0 before:h-5 before:w-full sm:w-48 sm:border sm:shadow-md dark:divide-gray-700 dark:border-gray-700 dark:bg-gray-800 sm:dark:border">
                <Link
                  className="flex items-center gap-x-3.5 rounded-lg px-3 py-2 text-sm text-gray-800 hover:bg-gray-100 focus:ring-2 focus:ring-blue-500 dark:text-gray-400 dark:hover:bg-gray-700 dark:hover:text-gray-300 dark:focus:outline-none dark:focus:ring-1 dark:focus:ring-gray-600"
                  href="/diary/new"
                >
                  新しい日記を書く
                </Link>
                <a
                  className="flex items-center gap-x-3.5 rounded-lg px-3 py-2 text-sm text-gray-800 hover:bg-gray-100 focus:ring-2 focus:ring-blue-500 dark:text-gray-400 dark:hover:bg-gray-700 dark:hover:text-gray-300 dark:focus:outline-none dark:focus:ring-1 dark:focus:ring-gray-600"
                  href="/diary/list"
                >
                  日記一覧
                </a>
              </div>
            </div>
          </div>
        </div>
      </nav>
    </header>
  );
}

export default Header;もしimport { ChevronDown } from "lucide-react";でエラーになる場合は lucide-react のバージョンを落としてみてください。
issueでも根本的な要因が分かってないようですが、これで直る可能性があります(実際直りました)※その上で最新を当てなおすとエラーが消えたりも。ESLintが上手く機能してないだけ?
# バージョン落とす場合
$ pnpm rm lucide-react
$ pnpm add lucide-react@^0.294.0

dependencies:
+ lucide-react 0.294.0 (0.307.0 is available)
LayoutにHeaderコンポーネントを読み込みます
import Header from "@/components/header";
export default function Layout({ children }: { children: React.ReactNode }) {
return (
<div>
<Header />
{children}
</div>
);
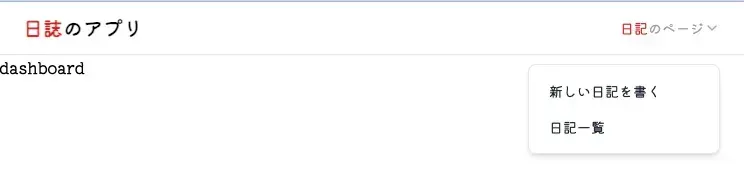
}ページも作成します。
export default async function Home() {
  return <div>dashboard</div>;
}
app直下のpage.tsxは不要なので削除します
$ rm src/app/page.tsxこの時点でヘッダはこんな感じになります。
環境が整ったので、次の作業に移ります