- Next.js 環境構築
- PrismaとPostgreSQLの設定
- NextAuth ログイン機能の実装 👈ココ
- NextAuth ログイン制御の実施・機能拡張
- Tiptapでマークダウンエディタ作成
- 日記の登録
- 画像のアップロード MinIOの設定
概要
Auth.js (NextAuth.js)を用いたGoogleログイン機能を実装していきます。

一通りの実装が終わったらAuth.jsへの理解を深めるため、別途パスワードログイン機能を追加していきます。
※なおパスキーの時代ですし、Auth.jsもパスワードの利用は推奨してません
記載時点では最新のAuth.jsドキュメントに誘導されたり、Auth.jsからNexuAuth.jsドキュメントに戻されるパターン等もあって、非常に読みにくい状態となっています。
ここではNextAuth v4のドキュメントを中心にして実装しています(ブログに転記した時点で v5 が出ています)。
NextAuthの追加
まずNextAuthを使えるようにするため、パッケージを追加します。
$ pnpm add next-authログイン画面テンプレートの用意
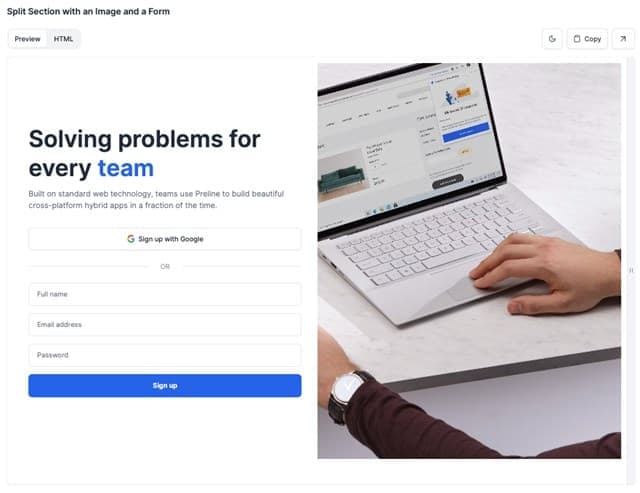
ヘッダと同じくPrelineの Hero Formsをベースに作成します。
使うものはお好みですが、今回はGoogleによるサインアップ(+パスワードログイン)という形としたいので、以下のテンプレートを利用しています。
Unsplashから画像を取得
右側の画像は Unsplash のものに差し替えるので、あらかじめ用意しておきます。

今回はこちらを利用しました(日記というか付箋です)。
Unsplashでcharlesdeluvioが撮影した写真
ダウンロードした画像ファイルはpublic配下に配置します。
public/static/hero-cover.jpgレイアウト
まずPrelineからソースをコピーすると以下になります。
これをNext.jsで使えるJSX形式に直し、Googleのログイン機能を実装していきます。
※パスワードログインは後回しにするので、いったんフォーム部分は削除します。
<!-- Hero -->
<div class="relative overflow-hidden">
  <div class="mx-auto max-w-screen-md py-12 px-4 sm:px-6 md:max-w-screen-xl md:py-20 lg:py-32 md:px-8">
    <div class="md:pe-8 md:w-1/2 xl:pe-0 xl:w-5/12">
      <!-- Title -->
      <h1 class="text-3xl text-gray-800 font-bold md:text-4xl md:leading-tight lg:text-5xl lg:leading-tight dark:text-gray-200">
        Solving problems for every <span class="text-blue-600 dark:text-blue-500">team</span>
      </h1>
      <p class="mt-3 text-base text-gray-500">
        Built on standard web technology, teams use Preline to build beautiful cross-platform hybrid apps in a fraction of the time.
      </p>
      <!-- End Title -->

      <div class="mt-8 grid">
        <button type="button" class="py-3 px-4 inline-flex justify-center items-center gap-x-2 text-sm font-medium rounded-lg border border-gray-200 bg-white text-gray-800 shadow-sm hover:bg-gray-50 disabled:opacity-50 disabled:pointer-events-none dark:bg-slate-900 dark:border-gray-700 dark:text-white dark:hover:bg-gray-800 dark:focus:outline-none dark:focus:ring-1 dark:focus:ring-gray-600">
          <svg class="w-4 h-auto" width="46" height="47" viewBox="0 0 46 47" fill="none">
            <path d="M46 24.0287C46 22.09 45.8533 20.68 45.5013 19.2112H23.4694V27.9356H36.4069C36.1429 30.1094 34.7347 33.37 31.5957 35.5731L31.5663 35.8669L38.5191 41.2719L38.9885 41.3306C43.4477 37.2181 46 31.1669 46 24.0287Z" fill="#4285F4"/>
            <path d="M23.4694 47C29.8061 47 35.1161 44.9144 39.0179 41.3012L31.625 35.5437C29.6301 36.9244 26.9898 37.8937 23.4987 37.8937C17.2793 37.8937 12.0281 33.7812 10.1505 28.1412L9.88649 28.1706L2.61097 33.7812L2.52296 34.0456C6.36608 41.7125 14.287 47 23.4694 47Z" fill="#34A853"/>
            <path d="M10.1212 28.1413C9.62245 26.6725 9.32908 25.1156 9.32908 23.5C9.32908 21.8844 9.62245 20.3275 10.0918 18.8588V18.5356L2.75765 12.8369L2.52296 12.9544C0.909439 16.1269 0 19.7106 0 23.5C0 27.2894 0.909439 30.8731 2.49362 34.0456L10.1212 28.1413Z" fill="#FBBC05"/>
            <path d="M23.4694 9.07688C27.8699 9.07688 30.8622 10.9863 32.5344 12.5725L39.1645 6.11C35.0867 2.32063 29.8061 0 23.4694 0C14.287 0 6.36607 5.2875 2.49362 12.9544L10.0918 18.8588C11.9987 13.1894 17.25 9.07688 23.4694 9.07688Z" fill="#EB4335"/>
          </svg>
          Sign up with Google
        </button>
      </div>

      <div class="py-6 flex items-center text-sm text-gray-400 uppercase before:flex-[1_1_0%] before:border-t before:me-6 after:flex-[1_1_0%] after:border-t after:ms-6 dark:text-gray-500 dark:before:border-gray-600 dark:after:border-gray-600">Or</div>

      <!-- Form -->
      <form>
        <div class="mb-4">
          <label for="hs-hero-name-2" class="block text-sm font-medium dark:text-white"><span class="sr-only">Full name</span></label>
          <input type="text" id="hs-hero-name-2" class="py-3 px-4 block w-full border-gray-200 rounded-lg text-sm focus:border-blue-500 focus:ring-blue-500 disabled:opacity-50 disabled:pointer-events-none dark:bg-slate-900 dark:border-gray-700 dark:text-gray-400 dark:focus:ring-gray-600" placeholder="Full name">
        </div>

        <div class="mb-4">
          <label for="hs-hero-email-2" class="block text-sm font-medium dark:text-white"><span class="sr-only">Email address</span></label>
          <input type="email" id="hs-hero-email-2" class="py-3 px-4 block w-full border-gray-200 rounded-lg text-sm focus:border-blue-500 focus:ring-blue-500 disabled:opacity-50 disabled:pointer-events-none dark:bg-slate-900 dark:border-gray-700 dark:text-gray-400 dark:focus:ring-gray-600" placeholder="Email address">
        </div>

        <div class="mb-4">
          <label for="hs-hero-password-2" class="block text-sm font-medium dark:text-white"><span class="sr-only">Password</span></label>
          <input type="email" id="hs-hero-password-2" class="py-3 px-4 block w-full border-gray-200 rounded-lg text-sm focus:border-blue-500 focus:ring-blue-500 disabled:opacity-50 disabled:pointer-events-none dark:bg-slate-900 dark:border-gray-700 dark:text-gray-400 dark:focus:ring-gray-600" placeholder="Password">
        </div>

        <div class="grid">
          <button type="submit" class="py-3 px-4 inline-flex justify-center items-center gap-x-2 text-sm font-semibold rounded-lg border border-transparent bg-blue-600 text-white hover:bg-blue-700 disabled:opacity-50 disabled:pointer-events-none dark:focus:outline-none dark:focus:ring-1 dark:focus:ring-gray-600">Sign up</button>
        </div>
      </form>
      <!-- End Form -->
    </div>
  </div>

  <div class="hidden md:block md:absolute md:top-0 md:start-1/2 md:end-0 h-full bg-[url('https://images.unsplash.com/photo-1606868306217-dbf5046868d2?ixlib=rb-4.0.3&ixid=MnwxMjA3fDB8MHxwaG90by1wYWdlfHx8fGVufDB8fHx8&auto=format&fit=crop&w=1981&q=80')] bg-no-repeat bg-center bg-cover"></div>
  <!-- End Col -->
</div>
<!-- End Hero -->
Googleログイン用コンポーネントの作成
shadcn/uiの初期化
流行りのshadcn/ui (https://ui.shadcn.com/ )を利用してボタン処理を作成していきます。
shadcn/uiとは
- shadcnは海外でも読み方が分からなくて本人に聞いてる人がいましたが、シャドンでいいです。作成者のアカウント名です。
- Radix UIとTailwindCSSの組み合わせでできていて、柔軟にカスタマイズができることから人気を博しています。
まずCLIツールの初期化を実行します。
※1. Where is your global CSS file?
デフォルトだとsrc配下の指定となっていないので、注意が必要です。
プロジェクト作成時にsrc配下を指定した場合、意図しない場所にappディレクトリが作成されてしまい、起動できなくなります(Next.jsでAppは特別なディレクトリ)。
※2. Where is your tailwind.config.js located?
tailwind.configは js ではなく ts で作成されているので、手入力で指定します。
$ pnpm dlx shadcn-ui@latest init

√ Would you like to use TypeScript (recommended)? ... no / yes
√ Which style would you like to use? » New York
√ Which color would you like to use as base color? » Slate
√ Where is your global CSS file? ... src/app/globals.css
√ Would you like to use CSS variables for colors? ... no / yes
√ Are you using a custom tailwind prefix eg. tw-? (Leave blank if not) ...
√ Where is your tailwind.config.js located? ... tailwind.config.ts
√ Configure the import alias for components: ... @/components
√ Configure the import alias for utils: ... @/lib/utils
√ Are you using React Server Components? ... no / yes
√ Write configuration to components.json. Proceed? ... yes

✔ Writing components.json...
✔ Initializing project...
✔ Installing dependencies...

Success! Project initialization completed.
shadcn/uiの初期化を行うと tailwind.config.ts にもともと設定したPrelineの内容が消えてしまうので、再度設定し直します。
※エラーにはなりませんが、Prelineの機能は動かなくなります
/** prelineの設定が消えてしまうので、入れ直す */
/** @type {import('tailwindcss').Config} */
module.exports = {
  content: [
    "./node_modules/preline/preline.js",
  ],
  plugins: [require("preline/plugin")],
};
src/app/globals.css を見るとshadcn/ui用のcssが追加されていることが分かります。
shadcn/uiのボタン追加
ボタンのドキュメント
$ pnpm dlx shadcn-ui@latest add buttonコマンド実行後にcomponents/uiにボタンコンポーネントが作成されます。
import * as React from "react"
import { Slot } from "@radix-ui/react-slot"
import { cva, type VariantProps } from "class-variance-authority"

import { cn } from "@/lib/utils"

const buttonVariants = cva(
  "inline-flex items-center justify-center whitespace-nowrap rounded-md text-sm font-medium transition-colors focus-visible:outline-none focus-visible:ring-1 focus-visible:ring-ring disabled:pointer-events-none disabled:opacity-50",
  {
    variants: {
      variant: {
        default:
          "bg-primary text-primary-foreground shadow hover:bg-primary/90",
        destructive:
          "bg-destructive text-destructive-foreground shadow-sm hover:bg-destructive/90",
        outline:
          "border border-input bg-background shadow-sm hover:bg-accent hover:text-accent-foreground",
        secondary:
          "bg-secondary text-secondary-foreground shadow-sm hover:bg-secondary/80",
        ghost: "hover:bg-accent hover:text-accent-foreground",
        link: "text-primary underline-offset-4 hover:underline",
      },
      size: {
        default: "h-9 px-4 py-2",
        sm: "h-8 rounded-md px-3 text-xs",
        lg: "h-10 rounded-md px-8",
        icon: "h-9 w-9",
      },
    },
    defaultVariants: {
      variant: "default",
      size: "default",
    },
  }
)

export interface ButtonProps
  extends React.ButtonHTMLAttributes<HTMLButtonElement>,
    VariantProps<typeof buttonVariants> {
  asChild?: boolean
}

const Button = React.forwardRef<HTMLButtonElement, ButtonProps>(
  ({ className, variant, size, asChild = false, ...props }, ref) => {
    const Comp = asChild ? Slot : "button"
    return (
      <Comp
        className={cn(buttonVariants({ variant, size, className }))}
        ref={ref}
        {...props}
      />
    )
  }
)
Button.displayName = "Button"

export { Button, buttonVariants }
基本的に触らないですが、パラメータの確認もできるので中身は見た方が軽くでも良いです。
Googleのボタンコンポーネント作成
shadcn/uiのボタンを利用してログインボタンを作成します。
OAuthを利用する場合、 signIn を呼び出し、コールバックURLを指定するだけで動きます。
SVGはPrelineにあったものをそのまま使ってます。
※今回はパスワードログインやドメイン制限も行うので、NextAuthの認証周りも触ります。
import { Button } from "@/components/ui/button";
import { signIn } from "next-auth/react";

function GoogleSignInForm() {
  const loginWithGoogle = () =>
    signIn("google", {
      callbackUrl: "/",
    });
  return (
    <Button
      onClick={loginWithGoogle}
      className="py-3 px-4 inline-flex justify-center items-center gap-x-2 text-sm font-medium rounded-lg border border-gray-300 bg-white text-gray-800 shadow-sm hover:bg-gray-50 disabled:opacity-50 disabled:pointer-events-none dark:bg-slate-900 dark:border-gray-700 dark:text-white dark:hover:bg-gray-800 dark:focus:outline-none dark:focus:ring-1 dark:focus:ring-gray-600"
    >
      <svg
        className="w-4 h-auto"
        width="46"
        height="47"
        viewBox="0 0 46 47"
        fill="none"
      >
        <path
          d="M46 24.0287C46 22.09 45.8533 20.68 45.5013 19.2112H23.4694V27.9356H36.4069C36.1429 30.1094 34.7347 33.37 31.5957 35.5731L31.5663 35.8669L38.5191 41.2719L38.9885 41.3306C43.4477 37.2181 46 31.1669 46 24.0287Z"
          fill="#4285F4"
        />
        <path
          d="M23.4694 47C29.8061 47 35.1161 44.9144 39.0179 41.3012L31.625 35.5437C29.6301 36.9244 26.9898 37.8937 23.4987 37.8937C17.2793 37.8937 12.0281 33.7812 10.1505 28.1412L9.88649 28.1706L2.61097 33.7812L2.52296 34.0456C6.36608 41.7125 14.287 47 23.4694 47Z"
          fill="#34A853"
        />
        <path
          d="M10.1212 28.1413C9.62245 26.6725 9.32908 25.1156 9.32908 23.5C9.32908 21.8844 9.62245 20.3275 10.0918 18.8588V18.5356L2.75765 12.8369L2.52296 12.9544C0.909439 16.1269 0 19.7106 0 23.5C0 27.2894 0.909439 30.8731 2.49362 34.0456L10.1212 28.1413Z"
          fill="#FBBC05"
        />
        <path
          d="M23.4694 9.07688C27.8699 9.07688 30.8622 10.9863 32.5344 12.5725L39.1645 6.11C35.0867 2.32063 29.8061 0 23.4694 0C14.287 0 6.36607 5.2875 2.49362 12.9544L10.0918 18.8588C11.9987 13.1894 17.25 9.07688 23.4694 9.07688Z"
          fill="#EB4335"
        />
      </svg>
      Googleでログイン
    </Button>
  );
}

export default GoogleSignInForm;
ログイン画面の作成
ログイン画面はテンプレートから必要な部分を抽出しました
onClickなどのイベントはクライアントサイドなので "use client" を記載しています
(エラーになるので分かります)
"use client";
import GoogleSignInForm from "@/components/auth/google-signin-form";
export default function Login() {
return (
<div className="overflow-hidden">
<div className="mx-auto max-w-screen-md py-40 px-4 sm:px-6 md:max-w-screen-2xl md:py-20 lg:py-48 md:px-8">
<div className="md:pe-8 md:w-1/2 xl:pe-0 xl:w-5/12">
<h1 className="text-3xl text-gray-800 font-bold md:text-4xl md:leading-tight lg:text-5xl lg:leading-tight dark:text-gray-200">
<span className="text-red-600 dark:text-red-500">日記</span>の
アプリ
</h1>
<p className="mt-3 text-lg text-gray-500">
毎日の日記を管理するアプリケーションです。
</p>
<div className="mt-8 grid">
<GoogleSignInForm />
</div>
</div>
</div>
<div className="hidden md:block md:absolute md:top-0 max-w-xl md:start-1/2 md:end-0 h-full bg-[url('/static/report.jpg')] bg-no-repeat bg-center bg-cover"></div>
</div>
);
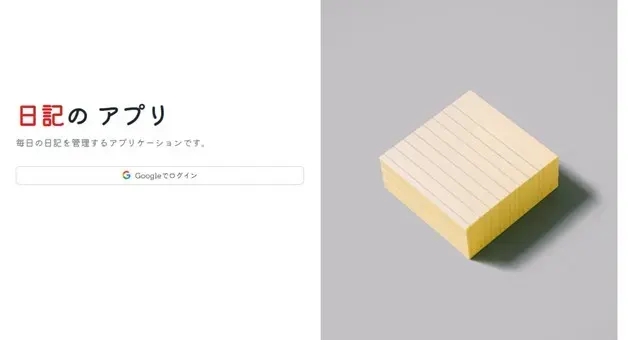
}この段階で http://localhost:3000/login にアクセスすると、以下のような画面になります

NextAuthの機能を組み込み
今の状態で「Googleでログイン」を押下しても404エラーページに遷移します。
App Router用の記載を参考にログイン用APIを作成していきます。
API routeの作成
src/app/auth/[...nextauth]/route.ts を作成し、サンプルの内容を記載します。
importしている authOptions は次で作成していきます。
import { authOptions } from "@/lib/auth";
import NextAuth from "next-auth";

const handler = NextAuth(authOptions);

export { handler as GET, handler as POST };
GoogleのOAuth2設定
手順はGoogle側のドキュメントを参考に実施します。

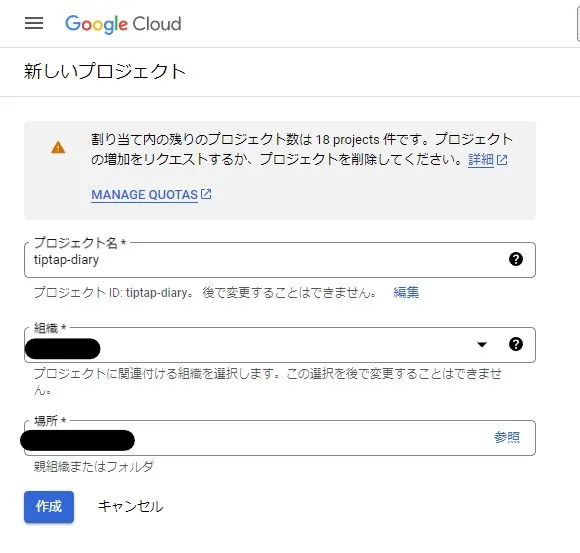
新しいプロジェクトを作成する
プロジェクト名等は任意のもので作成してください。
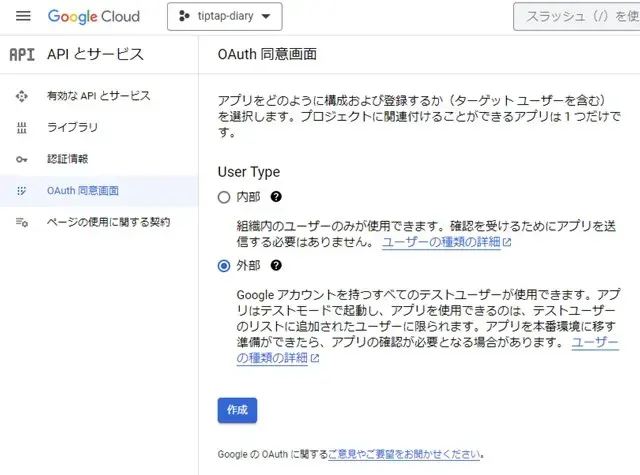
同意画面の作成
ロゴの横にある表記が作成したプロジェクト( tiptap-diary )となっていることを確認します。
「OAuth 同意画面」を開き、任意のGoogleアカウントでのログインとするので外部公開とします。
※今回はNextAuthでドメイン制限を行いますが、Google側でも制御ができます。
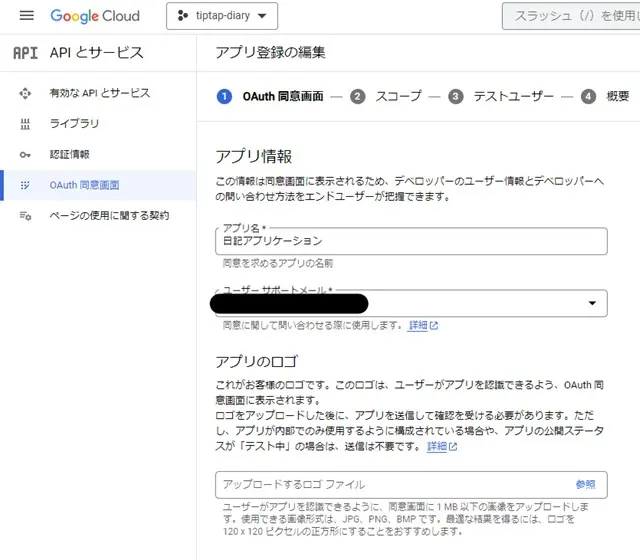
アプリケーション名と必要な項目(メールアドレス)を指定し、「保存して次へ」で概要まで行きます。
「アプリのロゴ」を指定すると本番環境モードで審査が必要となるため、今回は指定していません。
スコープ、テストユーザ、概要はデフォルトのままとして、「OAuth同意画面」のトップに戻ります。
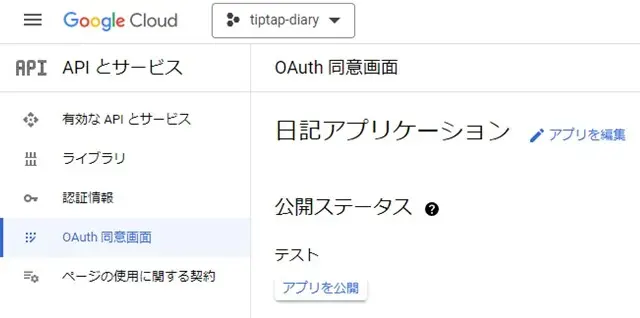
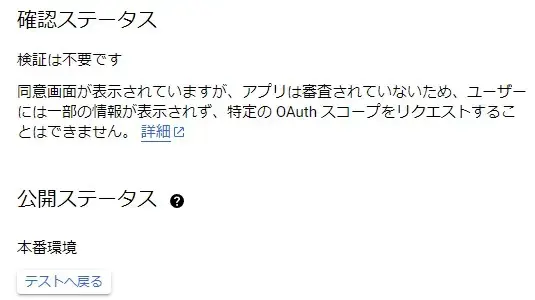
「アプリを公開」を押下し、本番環境にpushを行います。
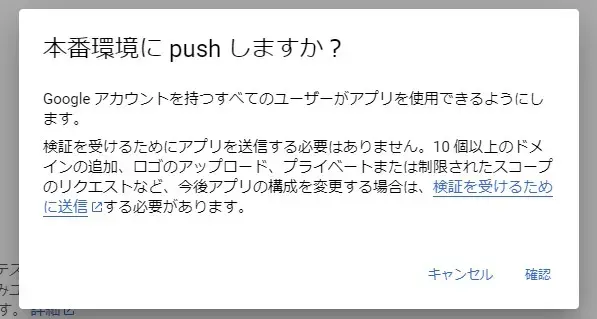
公開ステータスが本番環境に更新されます。
※テストモードのままやりたい場合は、テストユーザーなどを追加して実施してください。
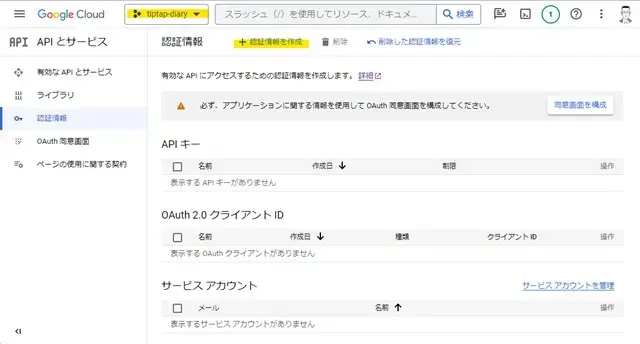
認証情報の作成
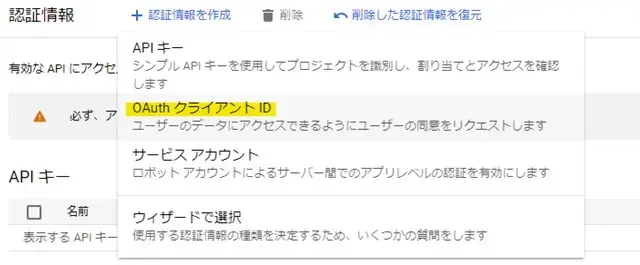
認証情報の画面から「認証情報を作成」を押下し、OAuth2.0の接続情報を作成していきます。
OAuth クライアントIDを選択
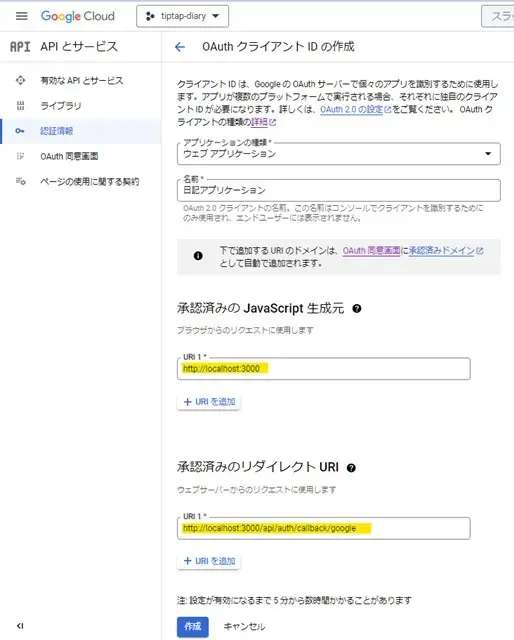
「承認済みの JavaScript 生成元」には http://localhost:3000 を指定し、
「承認済みのリダイレクト URI」には http://localhost:3000/api/auth/callback/google を指定します。
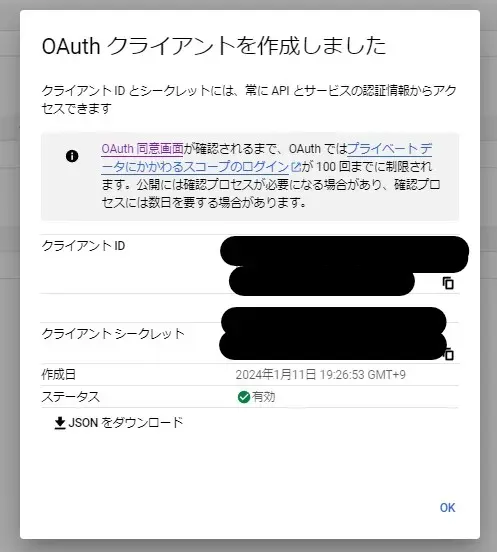
クライアントIDとクライアントシークレットを使うので、メモしておきます。
※後からでも確認できます
Google側の準備が完了したので、実装に戻ります。
Googleログインを実装する
環境変数を更新
.env.localに、GoogleのクライアントIDとシークレットを反映します。
#Google
GOOGLE_CLIENT_ID=メモったクライアントID
GOOGLE_CLIENT_SECRET=クライアントシークレット
NextAuthのオプションを作成する
オプションはログイン後のセッション取得などでも利用するため、別ファイルに作成します。
以下ドキュメントがありますが、最低限必要な情報を追加していきます。
NextAuthが利用するアダプターをインストールします。
ドキュメントでは @auth/prisma-adapter ですが、今回は@next-auth/prisma-adapter を利用します。
$ pnpm add @next-auth/prisma-adapterこのままだとimport時にエラーが出るので、prismaを更新します。
(※migrateでもいいと思いますが、中身もないのでdb pushにしてます)
$ dotenv -e .env.local -- pnpx prisma db pushNEXTAUTH_SECRET を環境変数に定義する
- Used to encrypt the NextAuth.js JWT, and to hash email verification tokens. This is the default value for the
secretoption in NextAuth and Middleware.
JWTの暗号化トークンとして必要になるので、設定しておきます。
ドキュメントにも記載されてますが、opensslで作成するのが通例です。
$ openssl rand -base64 32

S5rOlms8pn23rmBPPy8WM69sRpbGuR4YOAIk/BDGK4Q=
生成された文字列を設定します。
DATABASE_URL='postgresql://postgres:password@localhost:5432/postgres'
#NextAuth env
NEXTAUTH_SECRET=S5rOlms8pn23rmBPPy8WM69sRpbGuR4YOAIk/BDGK4Q=
authOptionsを作成する
NextAuthのオプションを構成していきます。
adapter にPrismaを指定し、 providers にGoogleProviderを指定します。
パスワードログインやドメイン制限機能はログインが成功してから追加します。
import { PrismaAdapter } from "@next-auth/prisma-adapter";
import { NextAuthOptions } from "next-auth";
import GoogleProvider from "next-auth/providers/google";
import db from "./db";

export const authOptions: NextAuthOptions = {
  adapter: PrismaAdapter(db),
  secret: process.env.NEXTAUTH_SECRET, //JWTの暗号化に使う
  session: {
    strategy: "jwt", //デフォルトでjwt。今回は明示的に指定
  },
  pages: {
    signIn: "/login", //ログインページのURL
  },
  debug: false, //デバッグtrueにすると大量のログが出力されるので注意
  providers: [
    //https://developers.google.com/identity/protocols/oauth2?hl=ja
    GoogleProvider({
      clientId: process.env.GOOGLE_CLIENT_ID!,
      clientSecret: process.env.GOOGLE_CLIENT_SECRET!,
    }),
  ],
};
ログインテスト
特にエラーが起きていなければ、サーバを起動して認証ができるか確認します。
$ pnpm devhttp://localhost:3000/login にアクセスして、「Googleでログイン」を押下します。
OAuthのログイン画面が表示されるので、任意のアカウントでログインを実施してみます。
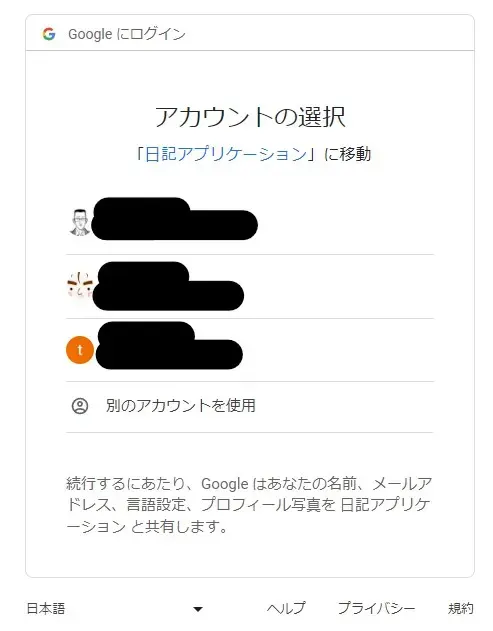
ログインに成功すると、ダッシュボード画面 ( http://localhost:3000/ )が開きます。
失敗する場合はTipsを参考にしてください。
ユーザー作成の確認
認証に成功したアカウントはDBに保存されるので、そちらも確認しておきます。
Prisma Studioを起動します。
$ dotenv -e .env.local -- pnpx prisma studiohttp://localhost:5555 にアクセスし、AccountやUserテーブルを確認してみてください。
ログインしたユーザーに紐づく情報が確認できます。
これでGoogleのログイン機能が実装できました。
次はログイン状態をチェックし、ログインユーザーを扱った機能を実装していきます。
Tips
アクセスをブロック: このアプリのリクエストは無効です
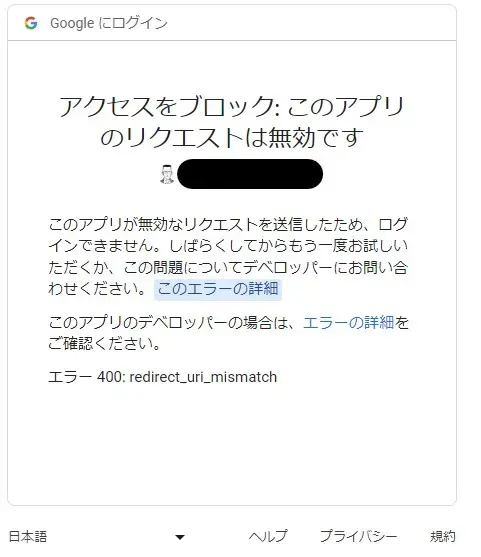
Googleログインでこの画面が出た場合は、「エラーの詳細」を押下して、そこに表示されるURLを確認します。
エラー内容によりますが 400: redirect_uri_mismatch の場合は、承認済みのリダイレクト URIの設定に誤りがあるので、詳細画面に表示されているURLを指定するようにしてください。
redirect_uri=http://localhost:3000/api/auth/callback/google
エラーのURLが返ってくる。
以下のようにerror=Callbackのような状態で正常に終了しない場合は、コンソールにエラーが出ていないかを確認してください。
一例ですが、dockerでPostgreSQLを起動していない場合に発生します。
http://localhost:3000/login?callbackUrl=http%3A%2F%2Flocalhost%3A3000%2F&error=Callback