- Discordクローン作成 1. 環境構築〜Clerkの設定
- Discordクローン作成 2. ダークモード〜Prisma, PlanetScale 👈ココ
- Discordクローン作成 3. モーダルUI, 画像(uploadthing)
- Discordクローン作成 4. サーバ作成, ナビゲーション
- Discordクローン作成 5. サーバー作成用モーダル、サイドバー作成
- Discordクローン作成 7. メンバーの管理
- Discordクローン作成 8. チャンネル作成、サーバ削除・退出
- Discordクローン作成 9. サーバ検索、チャンネルリスト
- Discordクローン作成 10. チャンネルページ作成
- Discordクローン作成 11. 会話ページ作成
- Discordクローン作成 12. メッセージ送信
- Discordクローン作成 13. リアルタイムチャット
4. ダークモード
ダークモード対応
shadcn/uiを利用してダークモードを実装する。手順は公式にしたがう。
next-themesのインストール
next-themesを利用してダークモードを実装する。 attributesの設定は以下参照。
pnpm add next-themestheme-providerの作成
ディレクトリはprovidersでまとめるようにしていく。
"use client"

import * as React from "react"
import { ThemeProvider as NextThemesProvider } from "next-themes"
import { type ThemeProviderProps } from "next-themes/dist/types"

export function ThemeProvider({ children, ...props }: ThemeProviderProps) {
  return <NextThemesProvider {...props}>{children}</NextThemesProvider>
}
rootのlayoutでThemeProviderを利用する。 ダークモードの背景色を変えるためにbg-whiteとdark:bg-[#313338]を利用する。
<body className={cn(font.className, "bg-white dark:bg-[#313338]")}>
  <ThemeProvider
    attribute="class"
    defaultTheme="dark"
    enableColorScheme={false}
    storageKey="discord-theme"
  >
    {children}
  </ThemeProvider>
</body>
属性は以下の通り。attributeはNext.jsならclassを指定。
- storageKey = ‘theme’: テーマ設定を localStorage に保存するために使用されるキー
- defaultTheme = ‘system’: デフォルトのテーマ名
- enableSystem = true dark:lightに基づいて切り替えるかどうか
- enableColorScheme = true: 入力やボタンなどの組み込み UI にどの配色 (暗いか明るい) が使用されているかをブラウザーに示すかどうか
- attribute = ‘data-theme’: アクティブなテーマに基づいて変更された HTML 属性, classおよびdata-*(任意のデータ属性、data-mode、data-colorなどを意味します)を受け入れます
suppressHydrationWarningの設定
Next.js 13の App Routerを利用する場合、ハイドレーションエラーが発生するのでhtmlタグにsuppressHydrationWarningを設定する。
<html lang="ja" suppressHydrationWarning>

</html>
suppressHydrationWarningは React のプロパティで、サーバーサイドレンダリング(SSR)とクライアントサイドレンダリング(CSR)の間で発生する可能性のある警告を抑制するために使用されます。React では、サーバーサイドでレンダリングされたマークアップとクライアントサイドでレンダリングされたマークアップが一致しない場合、警告が発生します。これは、Reactがクライアントサイドで既存のマークアップを「再利用」しようとするプロセス(これを「hydration」と呼びます)が、予期しない違いによって中断される可能性があるためです。suppressHydrationWarningプロパティをtrueに設定すると、この警告が抑制されます。ただし、このプロパティは基本的には開発者が意図的にマークアップの不一致を引き起こす場合にのみ使用するべきです。不一致が偶然に起こった場合、それは通常、バグの兆候であり、その警告は無視すべきではありません。
トグルの追加
"use client"

import * as React from "react"
import { MoonIcon, SunIcon } from "@radix-ui/react-icons"
import { useTheme } from "next-themes"

import { Button } from "@/components/ui/button"
import {
  DropdownMenu,
  DropdownMenuContent,
  DropdownMenuItem,
  DropdownMenuTrigger,
} from "@/components/ui/dropdown-menu"

export function ModeToggle() {
  const { setTheme } = useTheme()

  return (
    <DropdownMenu>
      <DropdownMenuTrigger asChild>
        <Button variant="outline" size="icon">
          <SunIcon className="h-[1.2rem] w-[1.2rem] rotate-0 scale-100 transition-all dark:-rotate-90 dark:scale-0" />
          <MoonIcon className="absolute h-[1.2rem] w-[1.2rem] rotate-90 scale-0 transition-all dark:rotate-0 dark:scale-100" />
          <span className="sr-only">Toggle theme</span>
        </Button>
      </DropdownMenuTrigger>
      <DropdownMenuContent align="end">
        <DropdownMenuItem onClick={() => setTheme("light")}>
          Light
        </DropdownMenuItem>
        <DropdownMenuItem onClick={() => setTheme("dark")}>
          Dark
        </DropdownMenuItem>
        <DropdownMenuItem onClick={() => setTheme("system")}>
          System
        </DropdownMenuItem>
      </DropdownMenuContent>
    </DropdownMenu>
  )
}
ドロップダウンメニューのコンポーネントがないので追加する
pnpm dlx shadcn-ui@latest add dropdown-menu

pnpm add @radix-ui/react-icons
5. Prisma, PlanetScaleの設定
Prismaの設定
Prismaのインストール
pnpm add -D prismaPrismaの初期化
pnpx prisma initprisma/schema.prisma にファイルが追加されている。 .envにもDATABASE_URLが追加されている。
DATABASE_URL="postgresql://johndoe:randompassword@localhost:5432/mydb?schema=public"Next steps:
- Set the DATABASE_URL in the .env file to point to your existing database. If your database has no tables yet, read https://pris.ly/d/getting-started
- Set the provider of the datasource block in schema.prisma to match your database: postgresql, mysql, sqlite, sqlserver, mongodb or cockroachdb.
- Run prisma db pull to turn your database schema into a Prisma schema.
- Run prisma generate to generate the Prisma Client. You can then start querying your database.
PlanetScaleを使うので、DATABASE_URLはあとから書き換える。
PlanetScaleの設定
Hobbyプランでも十分使えるPlanetScale。プロジェクトが1つしか作れないのが難点。 前はなかった気がするけど、東京リージョンがあるのは◯。 Supabaseはプロジェクト複数作れるので、そちらも検討して良い。小規模ならDockerで十分。 今やるとクレジットカード登録が必要(勝手に課金はない)。
プロジェクト作成
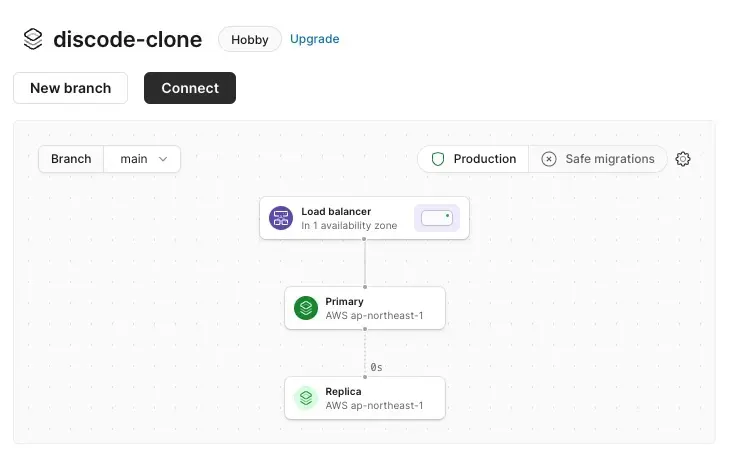
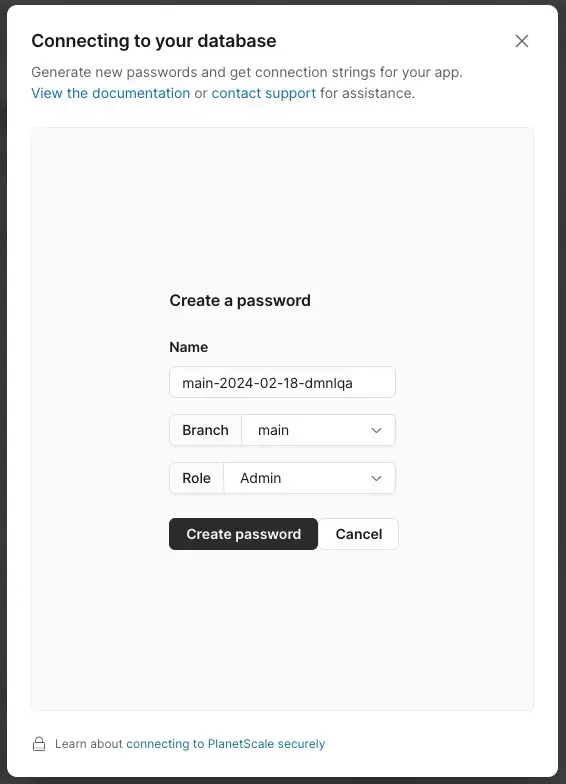
Connect を選択して接続用のパスワードを作成する。
ロールはAdminのまま。
Prismaに反映
作成すると Connect with から Prismaを選択することで、接続用のURLが表示される。
DATABASE_URL をコピーして .env に貼り付ける。
DATABASE_URL="postgresql://<username>:<password>@<cluster-name>.planetscale.com:5432/<database-name>?schema=public"また、同じようにschema.prisma側もコピペで書き換える。
Prisma スキーマ定義作成
PlanetScaleも準備ができたのでスキーマ定義を作成する。
テーブル定義
- Profile, Server, Member, Channelの4つのテーブルを作成する。
- ProfileがServer, Member, Channelを持っており、ServerがMember, Channelを持っている。
- Delete時にCascadeを指定している。
- MySQLの場合、@db.Textを指定しないと
VARCHAR(191)となる(なぜこんなに中途半端?) (https://www.prisma.io/docs/orm/overview/databases/mysql)
generator client {
  provider = "prisma-client-js"
}

datasource db {
  provider = "mysql"
  url = env("DATABASE_URL")
  relationMode = "prisma"
}

model Profile {
  id String @id @default(uuid())
  userId String @unique
  name String
  imageUrl String @db.Text
  email String @db.Text

  servers Server[]
  members Member[]
  channels Channel[]

  createdAt DateTime @default(now())
  updatedAt DateTime @updatedAt
}
model Server {
  id String @id @default(uuid())
  name String
  imageUrl String @db.Text
  inviteCode String @db.Text

  profileId String
  profile Profile @relation(fields: [profileId], references: [id], onDelete: Cascade)

  members Member[]
  channels Channel[]

  createdAt DateTime @default(now())
  updatedAt DateTime @updatedAt

  @@index ([profileId])
}

enum MemberRole {
  ADMIN
  MODERATOR
  GUEST
}

model Member {
  id String @id @default(uuid())
  role MemberRole @default(GUEST)

  profileId String
  profile Profile @relation(fields: [profileId], references: [id], onDelete: Cascade)

  serverId String
  server Server @relation(fields: [serverId], references: [id], onDelete: Cascade)

  createdAt DateTime @default(now())
  updatedAt DateTime @updatedAt

  @@index([profileId])
  @@index([serverId])

}

enum ChannelType {
  TEXT
  AUDIO
  VIDEO
}

model Channel {
  id String @id @default(uuid())
  name String
  type ChannelType @default(TEXT)

  profileId String
  profile Profile @relation(fields: [profileId], references: [id], onDelete: Cascade)

  serverId String
  server Server @relation(fields: [serverId], references: [id], onDelete: Cascade)

  createdAt DateTime @default(now())
  updatedAt DateTime @updatedAt

  @@index([profileId])
  @@index([serverId])
}
DBのマイグレーション
pnpx prisma generate
pnpx prisma db push
Prisma Clientの追加
pnpm add @prisma/clientPrisma Clientの設定
ホットリロード対策を入れた形で設定(公式どおり)
import { PrismaClient } from "@prisma/client";

declare global {
  var prisma: PrismaClient | undefined;
}

export const db = global.prisma || new PrismaClient();

if (process.env.NODE_ENV !== "production") {
  global.prisma = db;
}
プロフィール作成機能
プロフィール初期化ライブラリ
ログインユーザを元にプロフィールを作成するライブラリ。 存在する場合はログインユーザのプロフィールを返し、存在しない場合は新規作成する。
import { currentUser, redirectToSignIn } from "@clerk/nextjs";

import { db } from "@/lib/db";

export const initialProfile = async () => {
  const user = await currentUser();
  if (!user) {
    return redirectToSignIn();
  }

  const profile = await db.profile.findUnique({
    where: { userId: user.id },
  });

  if (profile) {
    return profile;
  }

  const newProfile = await db.profile.create({
    data: {
      userId: user.id,
      name: `${user.firstName} ${user.lastName}`,
      imageUrl: user.imageUrl,
      email: user.emailAddresses[0].emailAddress,
    },
  });

  return newProfile;
};
(main) を削除し、(setup)を追加
セットアップページではサーバを作成を行う。 (main)のpage.tsxが削除されたので、rootアクセス時に以下が表示される状態。
import { redirect } from "next/navigation";

import { db } from "@/lib/db";
import { initialProfile } from "@/lib/initial-profile";

const SetupPage = async () => {
  //プロフィールを取得する
  const profile = await initialProfile();

  //自分が所属するサーバから1件目を取得する
  const server = await db.server.findFirst({
    where: {
      members: {
        some: {
          profileId: profile.id,
        },
      },
    },
  });
  //サーバが存在する場合はそのサーバにリダイレクトする
  if (server) {
    return redirect(`/servers/${server.id}`);
  }

  return <div>Create a Server</div>;
};

export default SetupPage;
Prisma Studioで確認
ユーザが実際に作成されているのかを確認するためにPrisma Studioを利用する。
pnpx prisma studio