- Discordクローン作成 1. 環境構築〜Clerkの設定
- Discordクローン作成 2. ダークモード〜Prisma, PlanetScale
- Discordクローン作成 3. モーダルUI, 画像(uploadthing)
- Discordクローン作成 4. サーバ作成, ナビゲーション
- Discordクローン作成 5. サーバー作成用モーダル、サイドバー作成
- Discordクローン作成 6. 招待、サーバ設定
- Discordクローン作成 7. メンバーの管理
- Discordクローン作成 8. チャンネル作成、サーバ削除・退出
- Discordクローン作成 9. サーバ検索、チャンネルリスト
- Discordクローン作成 10. チャンネルページ作成
- Discordクローン作成 11. 会話ページ作成
- Discordクローン作成 12. メッセージ送信 👈ココ
- Discordクローン作成 13. リアルタイムチャット
24. メッセージ送信
メッセージ送信APIの作成
下準備 ログインユーザ取得処理
Page Routerでログインユーザを取得できるようにライブラリに追加App Routerで利用しているcurrent-profile.tsxも比較用に記載しておく
auth->getAuthに変更するreq: NextApiRequestを受け取り、getAuthの引数とする
lib/current-profile-pages.ts
import { db } from "@/lib/db";
import { getAuth } from "@clerk/nextjs/server";
import { NextApiRequest } from "next";

export const currentProfilePages = async (req: NextApiRequest) => {
  const { userId } = getAuth(req);
  if (!userId) {
    return null;
  }
  const profile = await db.profile.findUnique({
    where: {
      userId,
    },
  });

  return profile;
};
lib/current-profile.tsx
import { db } from "@/lib/db";
import { auth } from "@clerk/nextjs";

export const currentProfile = async () => {
  const { userId } = auth();
  if (!userId) {
    return null;
  }
  const profile = await db.profile.findUnique({
    where: {
      userId,
    },
  });

  return profile;
};
メッセージ送信API
pages/api/socket/messages/index.ts
import { currentProfilePages } from "@/lib/current-profile-pages";
import { db } from "@/lib/db";
import { NextApiResponseServerIo } from "@/types";
import { NextApiRequest } from "next";

export default async function handler(
  req: NextApiRequest,
  res: NextApiResponseServerIo
) {
  // console.log("[MESSAGES_POST]", req.method, req.query, req.body);
  // POST {
  //   channelId: 'a1b130bf-799e-4bc4-b872-966261396bc1',
  //   serverId: '8657074d-22d5-4d0e-8564-99c2a3e4e0b0'
  // } { content: 'テストメッセージ送信' }
  if (req.method !== "POST") {
    return res.status(405).json({ error: "Method not allowed" });
  }

  try {
    const profile = await currentProfilePages(req);
    const { content, fileUrl } = req.body;
    const { serverId, channelId } = req.query;

    if (!profile) {
      return res.status(401).json({ error: "Unauthorized" });
    }

    if (!serverId) {
      return res.status(401).json({ error: "Server ID missing" });
    }

    if (!channelId) {
      return res.status(401).json({ error: "Channel ID missing" });
    }

    if (!content) {
      return res.status(400).json({ error: "Content missing" });
    }

    const server = await db.server.findFirst({
      where: {
        id: serverId as string,
        members: {
          some: {
            profileId: profile.id,
          },
        },
      },
      include: {
        members: true,
      },
    });

    if (!server) {
      return res.status(404).json({
        message: "Server not found",
      });
    }

    const channel = await db.channel.findFirst({
      where: {
        id: channelId as string,
        serverId: server.id,
      },
    });

    if (!channel) {
      return res.status(404).json({
        message: "Channel not found",
      });
    }

    const member = server.members.find(
      (member) => member.profileId === profile.id
    );

    if (!member) {
      return res.status(401).json({ error: "Unauthorized" });
    }

    const message = await db.message.create({
      data: {
        content,
        fileUrl,
        channelId: channel.id,
        memberId: member.id,
      },
      include: {
        member: {
          include: {
            profile: true,
          },
        },
      },
    });

    const channelKey = `chat:${channelId}:messages`;

    res?.socket?.server?.io?.emit(channelKey, message);

    return res.status(200).json(message);
  } catch (error) {
    console.log("[MESSAGES_POST]", error);
    return res.status(500).json({ error: "Internal server error" });
  }
}
[Tips]メッセージ送信(DB更新)ができない問題が発生
実際にメッセージ送信した際に以下のエラーが発生した
terminal
Error handling upgrade request TypeError: Cannot read properties of undefined (reading 'bind')解決策
- Next.js 14で根本解決ができなかったため、一旦Next.js 13にダウングレードして解消。
- 付随していくつかライブラリもダウングレード実施。uploadthingがβ版というのもあって色々と触った(やっていることは変わらないが、パッケージの場所が変わっている等)
Clerk + Websocketで問題が起きる
- Clerkを利用した際に追加したmiddrewareが原因で、Websocketの接続が上手く制御できていないっぽい。
- Issueがいくつかあるが、どうも解決策が
バージョンを変えるしか出てこない。割といろんなバージョンで発生している - ClerkがNext.js 14のターボパックにはまだ対応していない?(5ヶ月前の記事なので流石に対応済か)
middleware.ts
import { authMiddleware } from "@clerk/nextjs";

// This example protects all routes including api/trpc routes
// Please edit this to allow other routes to be public as needed.
// See https://clerk.com/docs/references/nextjs/auth-middleware for more information about configuring your middleware
export default authMiddleware({
  publicRoutes: ["/api/uploadthing"],
});

export const config = {
  matcher: ["/((?!.*//..*|_next).*)", "/", "/(api|trpc)(.*)"],
};
- middleware.tsの記載も少し前のものに変更
- matcherの
"/(api|trpc)(.*)"の指定でWebsocket接続もマッチする形となっている。 - ここでマッチしたあとの処理が上手くいっていないっぽい
ignoreRoutesを追加して無視する…,matcherでマッチしないようにする…など解消策の記載はあったが、API実行時にClerkで認証状況を呼び出す必要がある。- マッチさせないとClerkの認証処理ができず、マッチさせると今回のエラーになるという地獄のような状況。
Next.js 14でやる方法がわかったらバージョンアップしたい(今は13で妥協する)。
ファイル送信用ダイアログの作成
モーダルにメッセージからファイルが遅れるようにする。基本的な実装は他のモーダル踏襲。
hooks/use-modal-store.ts
export type ModalType =
  | "createServer"
  | "invite"
  | "editServer"
  | "members"
  | "createChannel"
  | "leaveServer"
  | "deleteServer"
  | "deleteChannel"
  | "editChannel"
  | "messageFile";

interface ModalData {
  server?: Server;
  channel?: Channel;
  channelType?: ChannelType;
  apiUrl?: string;
  query?: Record<string, any>;
}- モーダルではファイルアップロードのみ実行。
- ChatInoutコンポーネントを呼び出す際に以下propsが渡されている
apiUrlは/api/socket/messagesqueryは{ serverId: server.id, channelId: channel.id }
- アップロードを実行すると、
messageテーブルに追加される
components/modals/messege-file-modal.tsx
"use client";

import { zodResolver } from "@hookform/resolvers/zod";
import axios from "axios";
import qs from "query-string";
import { useForm } from "react-hook-form";
import * as z from "zod";

import {
  Dialog,
  DialogContent,
  DialogDescription,
  DialogFooter,
  DialogHeader,
  DialogTitle,
} from "@/components/ui/dialog";

import { Form, FormControl, FormField, FormItem } from "@/components/ui/form";

import { FileUpload } from "@/components/file-upload";
import { Button } from "@/components/ui/button";
import { useModal } from "@/hooks/use-modal-store";
import { useRouter } from "next/navigation";

const formSchema = z.object({
  fileUrl: z.string().min(1, {
    message: "添付ファイルは必須です",
  }),
});

export const MessageFileModal = () => {
  const { isOpen, onClose, type, data } = useModal();
  const router = useRouter();
  const { apiUrl, query } = data;

  const isModalOpen = isOpen && type === "messageFile";

  const form = useForm({
    resolver: zodResolver(formSchema),
    defaultValues: {
      fileUrl: "",
    },
  });

  const isLoading = form.formState.isSubmitting;

  const onSubmit = async (values: z.infer<typeof formSchema>) => {
    try {
      const url = qs.stringifyUrl({
        url: apiUrl || "",
        query: query,
      });
      await axios.post(url, {
        ...values,
        content: values.fileUrl,
      });

      //初期化
      form.reset();
      router.refresh();
      handleClose();
    } catch (error) {
      console.error(error);
    }
  };

  const handleClose = () => {
    form.reset();
    onClose();
  };

  return (
    <Dialog open={isModalOpen} onOpenChange={handleClose}>
      <DialogContent className="bg-white text-black p-0 overflow-hidden">
        <DialogHeader className="pt-8 px-6">
          <DialogTitle className="text-2xl text-center font-bold">
            添付ファイルの追加
          </DialogTitle>
          <DialogDescription className="text-center text-zinc-500">
            メッセージと一緒にファイルを送信します
          </DialogDescription>
        </DialogHeader>
        <Form {...form}>
          <form onSubmit={form.handleSubmit(onSubmit)} className="space-y-8">
            <div className="space-y-8 px-6">
              <div className="flex items-center justify-center text-center">
                <FormField
                  control={form.control}
                  name="fileUrl"
                  render={({ field }) => (
                    <FormItem>
                      <FormControl>
                        <FileUpload
                          endpoint="messageFile"
                          value={field.value}
                          onChange={field.onChange}
                        />
                      </FormControl>
                    </FormItem>
                  )}
                />
              </div>
            </div>
            <DialogFooter className="bg-gray-100 px-6 py-4">
              <Button variant="primary" disabled={isLoading}>
                送信
              </Button>
            </DialogFooter>
          </form>
        </Form>
      </DialogContent>
    </Dialog>
  );
};
データが作成できる。
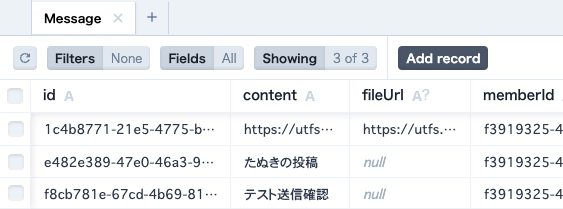
PDFファイルをアップロード
components/file-upload.tsx
"use client";

import Image from "next/image";

import { UploadDropzone } from "@/lib/uploadthing";

import "@uploadthing/react/styles.css";
import { FileIcon, X } from "lucide-react";

interface FileUploadProps {
  onChange: (url?: string) => void;
  value: string;
  endpoint: "messageFile" | "serverImage";
}

export const FileUpload = ({ onChange, value, endpoint }: FileUploadProps) => {
  const fileType = value.split(".").pop();
  if (value && fileType !== "pdf") {
    return (
      <div className="relative h-20 w-20">
        <Image fill alt="Upload" className="rounded-full" src={value} />
        <button
          onClick={() => onChange("")}
          className="bg-rose-500 text-white p-1 rounded-full absolute top-0 right-0 shadow-sm"
          type="button"
        >
          <X className="h-4 w-4" />
        </button>
      </div>
    );
  }
  if (value && fileType === "pdf") {
    return (
      <div className="relative flex items-center p-2 mt-2 rounded-md bg-background/10">
        <FileIcon className="h-10 w-10 fill-indigo-200 stroke-indigo-400" />
        <a
          href={value}
          target="_blank"
          rel="noopener noreferrer"
          className="ml-2 text-sm text-indigo-500 dark:text-indigo-400 hover:underline"
        >
          {value}
        </a>
        <button
          onClick={() => onChange("")}
          className="bg-rose-500 text-white p-1 rounded-full absolute -top-2 -right-2 shadow-sm"
          type="button"
        >
          <X className="h-4 w-4" />
        </button>
      </div>
    );
  }
  return (
    <div>
      <UploadDropzone
        endpoint={endpoint}
        onClientUploadComplete={(file) => {
          onChange(file?.[0]?.url);
        }}
        onUploadError={(error: Error) => {
          console.error(error);
        }}
      />
    </div>
  );
};
noopenerとnoreferrerの指定
aタグのrel=”noopener noreferrer”の意味とは?
noopenerは新しいウィンドウを開いたときに、そのウィンドウが元のウィンドウを参照できないようにするものnoreferrerはリンク先のページがリンク元のページを参照できないようにするもの
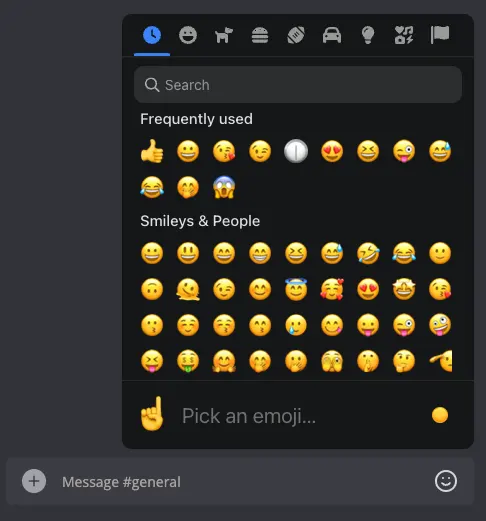
25. 絵文字
絵文字送信機能
絵文字機能を追加していく。Google Chatにあるようなアレ。
popoverの追加
terminal
pnpm dlx shadcn-ui@latest add popoveremojiの追加
terminal
pnpm add emoji-mart @emoji-mart/data @emoji-mart/reactcomponents/emoji-picker.tsx
"use client";

import {
  Popover,
  PopoverContent,
  PopoverTrigger,
} from "@/components/ui/popover";
import data from "@emoji-mart/data";
import Picker from "@emoji-mart/react";
import { Smile } from "lucide-react";
import { useTheme } from "next-themes";

interface EmojiPickerProps {
  onChange: (value: string) => void;
}

export const EmojiPicker = ({ onChange }: EmojiPickerProps) => {
  const { resolvedTheme } = useTheme();
  return (
    <Popover>
      <PopoverTrigger>
        <Smile className="text-zinc-500 dark:text-zinc-400 hover:text-zinc-600 dark:hover:text-zinc-300 transition" />
      </PopoverTrigger>
      <PopoverContent
        side="right"
        sideOffset={40}
        className="bg-transparent border-none shadow-none drop-shadow-none mb-16"
      >
        {/** emoji.nativeでstringをonChangeにわたす */}
        <Picker
          theme={resolvedTheme}
          data={data}
          onEmojiSelect={(emoji: any) => onChange(emoji.native)}
        />
      </PopoverContent>
    </Popover>
  );
};
components/chat/chat-input.tsx
<div className="absolute top-7 right-8">
  <EmojiPicker
    onChange={(emoji: string) => {
      field.onChange(`${field.value}${emoji}`);
    }}
  />
</div>
チャット入力周りはこれで完了。表示に移る。
26. チャットメッセージ表示
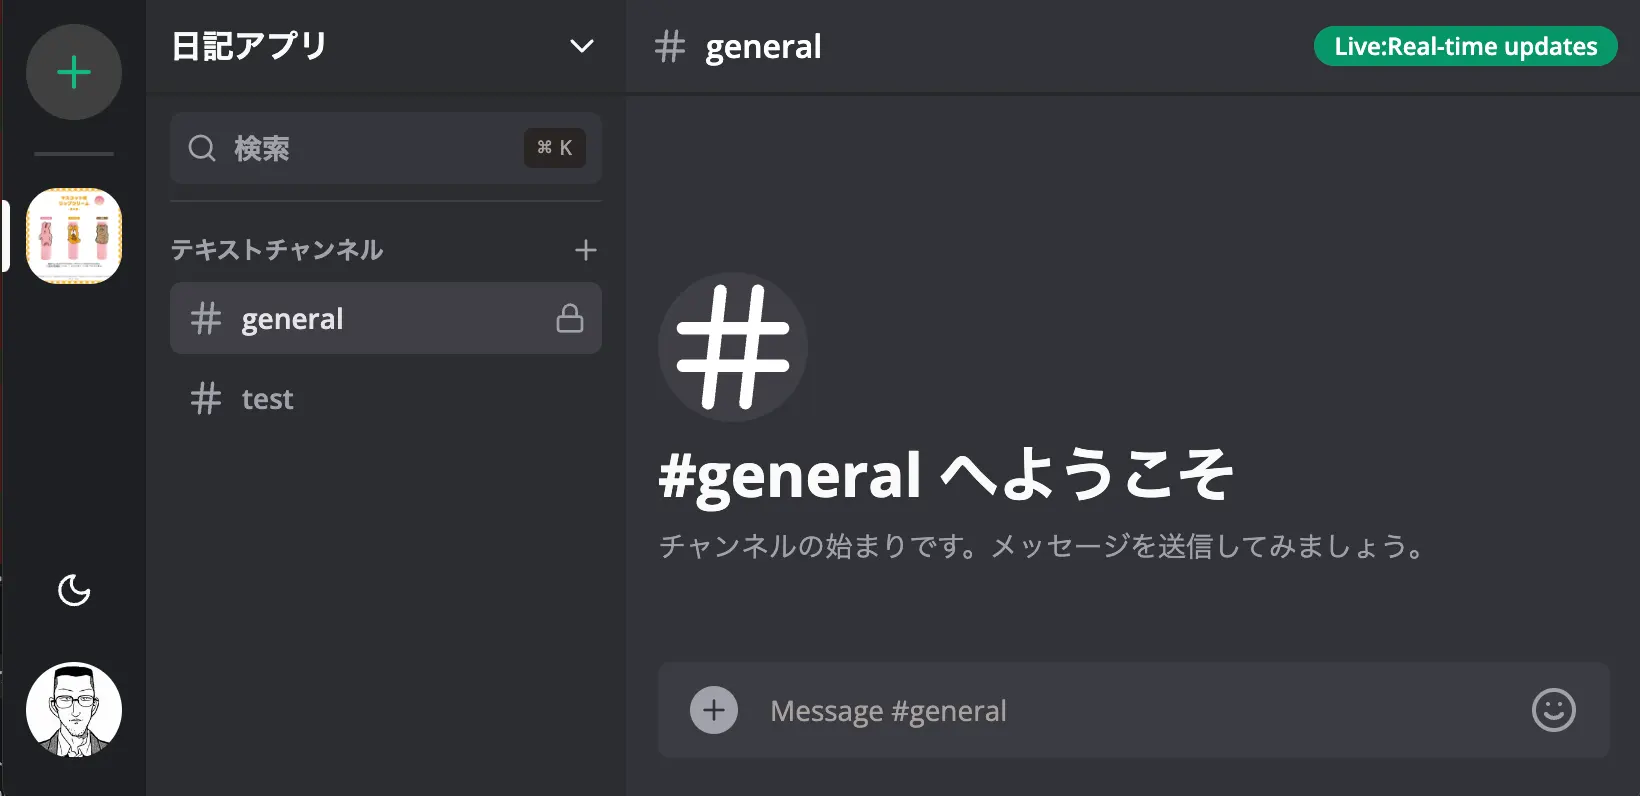
Welcomeメッセージ部
ChatMessagesコンポーネントを作成する。ChatWelcomeコンポーネントを作成し、ChatMessagesコンポーネントから読み込む。- Websocketでメッセージ受信を行うので、
socketUrlなどのpropsも渡している。
components/chat/chat-welcome.tsx
import { Hash } from "lucide-react";

interface ChatWelcomeProps {
  type: "channel" | "conversation";
  name: string;
}

export const ChatWelcome = ({ type, name }: ChatWelcomeProps) => {
  return (
    <div className="space-y-2 px-4 mb-4">
      {type === "channel" && (
        <div className="h-[75px] w-[75px] rounded-full bg-zinc-500 dark:bg-zinc-700 flex items-center justify-center">
          <Hash className="h-20 w-20 text-white " />
        </div>
      )}
      <p className="text-xl md:text-3xl font-bold">
        {type === "channel" ? "#" : ""}
        {name} へようこそ
      </p>
      <p className="text-zinc-600 dark:text-zinc-400 text-sm">
        {type === "channel"
          ? "チャンネルでメッセージを送信してみましょう。"
          : `${name}にメッセージを送信してみましょう。`}
      </p>
    </div>
  );
};
components/chat/chat-messages.tsx
"use client";

import { Member } from "@prisma/client";
import { ChatWelcome } from "./chat-welcome";

interface ChatMessagesProps {
  name: string;
  member: Member;
  chatId: string;
  apiUrl: string;
  socketUrl: string;
  socketQuery: Record<string, string>;
  paramKey: "channelId" | "conversationId";
  paramValue: string;
  type: "channel" | "conversation";
}

export const ChatMessages = ({
  name,
  member,
  chatId,
  apiUrl,
  socketUrl,
  socketQuery,
  paramKey,
  paramValue,
  type,
}: ChatMessagesProps) => {
  return (
    <div className="flex-1 flex flex-col py-4 overflow-auto">
      <div className="flex-1" />
      <ChatWelcome type={type} name={name} />
    </div>
  );
};
app/(main)/(routes)/servers/[serverId]/channels/[channelId]/page.tsx
return (
  <div className="bg-white dark:bg-[#313338] flex flex-col h-full">
    <ChatHeader
      serverId={params.serverId}
      name={channel.name}
      type="channel"
    />
    <ChatMessages
      member={member}
      name={channel.name}
      chatId={channel.id}
      type={"channel"}
      apiUrl="/api/messages"
      socketUrl="/api/socket/messages"
      socketQuery={{ channelId: channel.id, serverId: channel.serverId }}
      paramKey="channelId"
      paramValue={channel.id}
    />
    <ChatInput
      name={channel.name}
      type="channel"
      apiUrl="/api/socket/messages"
      query={{
        channelId: channel.id,
        serverId: channel.serverId,
      }}
    />
  </div>
);
TanStack Queryの導入
パッケージ追加
terminal
pnpm add @tanstack/react-queryQueryProviderの作成
App Routerでの利用方法は以下を参照(基本形はここの記載の通り)。- 公式だとuseState使わないでね、と書いてある(が、今回は使っている。使わなくて良さそうなら変更する)
Advanced Server Rendering | TanStack Query React Docs
Welcome to the Advanced Server Rendering guide, where you will learn all about using React Query with streaming, Server Components and the Next.js app router. You might want to read the before this on...

components/providers/query-provider.tsx
"use client";

import { QueryClient, QueryClientProvider } from "@tanstack/react-query";
import { useState } from "react";

export const QueryProvider = ({ children }: { children: React.ReactNode }) => {
  const [queryClient] = useState(() => new QueryClient());

  return (
    <QueryClientProvider client={queryClient}>{children}</QueryClientProvider>
  );
};
app/layout.tsx
return (
  <ClerkProvider>
    <html lang="ja" suppressHydrationWarning>
      <body className={cn(font.className, "bg-white dark:bg-[#313338]")}>
        <ThemeProvider
          attribute="class"
          defaultTheme="dark"
          enableColorScheme={false}
          storageKey="discord-theme"
        >
          <SocketProvider>
            <ModalProvider />
            <QueryProvider>{children}</QueryProvider>
          </SocketProvider>
        </ThemeProvider>
      </body>
    </html>
  </ClerkProvider>
フックの作成
Tanstack QueryのuseInfiniteQueryを利用して、メッセージを取得するフックを作成する。無限スクロールに対応できるらしい。
hooks/use-chat-query.ts
import { useInfiniteQuery } from "@tanstack/react-query";
import qs from "query-string";

import { useSocket } from "@/components/providers/socket-provider";

interface ChatMessagesProps {
  queryKey: string;
  apiUrl: string;
  paramKey: "channelId" | "conversationId";
  paramValue: string;
}

export const useChatQuery = ({
  queryKey,
  apiUrl,
  paramKey,
  paramValue,
}: ChatMessagesProps) => {
  const { isConnected } = useSocket();

  const fetchMessages = async ({ pageParam = undefined }) => {
    const url = qs.stringifyUrl(
      {
        url: apiUrl,
        query: {
          cursor: pageParam,
          [paramKey]: paramValue,
        },
      },
      { skipNull: true }
    );

    const res = await fetch(url);
    return res.json();
  };

  //refetchIntervalはWebsocketが接続できない状況の場合に
  //ポーリングでデータを取得するように設定を行うために指定している。
  const { data, fetchNextPage, hasNextPage, isFetchingNextPage, status } =
    useInfiniteQuery({
      queryKey: [queryKey],
      queryFn: fetchMessages,
      getNextPageParam: (lastPage) => lastPage?.nextCursor,
      refetchInterval: isConnected ? false : 1000,
    });

  return {
    data,
    fetchNextPage,
    hasNextPage,
    isFetchingNextPage,
    status,
  };
};
フックの呼び出し
-useInfiniteQueryのstatusを判断して画面を描画する
components/chat/chat-messages.tsx
"use client";

import { useChatQuery } from "@/hooks/use-chat-query";
import { Member } from "@prisma/client";
import { Loader2, ServerCrash } from "lucide-react";
import { ChatWelcome } from "./chat-welcome";

interface ChatMessagesProps {
  name: string;
  member: Member;
  chatId: string;
  apiUrl: string;
  socketUrl: string;
  socketQuery: Record<string, string>;
  paramKey: "channelId" | "conversationId";
  paramValue: string;
  type: "channel" | "conversation";
}

export const ChatMessages = ({
  name,
  member,
  chatId,
  apiUrl,
  socketUrl,
  socketQuery,
  paramKey,
  paramValue,
  type,
}: ChatMessagesProps) => {
  const queryKey = `chat:${chatId}`;
  const { data, fetchNextPage, hasNextPage, isFetchingNextPage, status } =
    useChatQuery({
      queryKey,
      apiUrl,
      paramKey,
      paramValue,
    });

  if (status === "loading") {
    return (
      <div className="flex flex-col flex-1 justify-center items-center">
        <Loader2 className="h-7 w-7 text-zinc-500 animate-spin my-4" />
        <p className="text-xs text-zinc-500 dark: dark:text-zinc-400">
          メッセージを読み込んでいます...
        </p>
      </div>
    );
  }
  if (status === "error") {
    return (
      <div className="flex flex-col flex-1 justify-center items-center">
        <ServerCrash className="h-7 w-7 text-zinc-500 my-4" />
        <p className="text-xs text-zinc-500 dark: dark:text-zinc-400">
          読み込みに問題が発生しています
        </p>
      </div>
    );
  }
  return (
    <div className="flex-1 flex flex-col py-4 overflow-auto">
      <div className="flex-1" />
      <ChatWelcome type={type} name={name} />
    </div>
  );
};
※!なぜかデプロイで失敗するようになったのでgif削除
メッセージ取得API
無限スクロールによるページネーションを行うので、cursorを利用してデータを取得する。これは公式の図がわかりやすい。
Pagination (Reference) | Prisma Documentation
Prisma Client supports both offset pagination and cursor-based pagination. Learn more about the pros and cons of different pagination approaches and how to implement them.
take、skip、cursorを利用してデータを取得する。- 公式には2通りの取得方法が記載されていて、カーソルを使うか否かで発行されるクエリが変わる。
- カーソルを使うのは無限スクロール方式に適していて、開始位置までのデータは
取得しない。使わないとそこまでのデータを探査するので効率が悪い。 - スキップを利用する場合、カーソル位置が前ページの最終項目で良い(これも公式のよくあるQAに記載されている)
app/api/messages/route.ts
import { currentProfile } from "@/lib/current-profile";
import { db } from "@/lib/db";
import { Message } from "@prisma/client";
import { NextResponse } from "next/server";

const MESSAGES_BATCH = 10;

export async function GET(req: Request) {
  try {
    const profile = await currentProfile();
    const { searchParams } = new URL(req.url);
    const cursor = searchParams.get("cursor");
    const channelId = searchParams.get("channelId");

    if (!profile) {
      return new NextResponse("Unauthorized", { status: 401 });
    }

    if (!channelId) {
      return new NextResponse("Channel ID missing", { status: 400 });
    }

    let messages: Message[] = [];

    if (cursor) {
      messages = await db.message.findMany({
        take: MESSAGES_BATCH,
        skip: 1,
        cursor: {
          id: cursor,
        },
        where: {
          channelId,
        },
        include: {
          member: {
            include: {
              profile: true,
            },
          },
        },
        orderBy: {
          createdAt: "desc",
        },
      });
    } else {
      messages = await db.message.findMany({
        take: MESSAGES_BATCH,
        where: {
          channelId,
        },
        include: {
          member: {
            include: {
              profile: true,
            },
          },
        },
        orderBy: {
          createdAt: "desc",
        },
      });
    }
    let nextCursor = null;
    if (messages.length === MESSAGES_BATCH) {
      nextCursor = messages[messages.length - 1].id;
    }
    return NextResponse.json({ items: messages, nextCursor });
  } catch (error) {
    console.error("MESSAGES_GET", error);
    return new NextResponse("Internal Server Error", { status: 500 });
  }
}
メッセージ用ブロック追加
仮置きだがこれでメッセージが表示される。今はpdf等のURLもそのまま表示される。
components/chat/chat-messages.tsx
return (
  <div className="flex flex-col-reverse mt-auto">
    {data?.pages?.map((group, i) => (
      <Fragment key={i}>
        {group.items.map((message: MessageWithMemberWithProfile) => (
          <div key={message.id}>{message.content}</div>
        ))}
      </Fragment>
    ))}
  </div>
);